OAuth 2.0 grant types with WSO2 API Manager - I - Authorization Code
WSO2 API Manager is a complete open source solution to manage APIs. It provides authorization and authentication for APIs using OAuth 2.0 standard. According to the OAuth specification, the client needs to get authorization from the resource owner when requesting an access token. The authorization is expressed in the form of an authorization grant, which the client uses to request the access token. There are 4 grant types defined in the OAuth spec.
- Authorization code
- Implicit
- Resource owner password credentials
- Client credentials
Almost all scenarios explained in the online documentations written on WSO2 API Manager, make use of the Resource owner password credentials grant type. In there, we exchanges access token for user credentials and client_id and client_secret.
I'm going to explain the use of all 4 OAuth grant types using WSO2 API Manager through a serious of blog posts. In this post, I will explain how we can use Authorization Code grant type with WSO2 API Manager.
Pre-requisites:
==============
1. Download and install WSO2 API Manager-1.4.0
2. Install Apache Tomcat

When calling an API hosted in WSO2 API Manager, we need to associate an OAuth access token as part of the requests HTTP header to authenticate the caller.
POST http://localhost:8280/myapi/1.0.0 HTTP/1.1
Accept-Encoding: gzip,deflate
Content-Type: text/xml;charset=UTF-8
SOAPAction: "urn:echoInt"
Authorization: Bearer 21737b20a287fb4e207bf08bf3b17924
WSO2 API manager consists of multiple components to provide unique functionalities required to manage APIs hosted in it. Authorization server, which is one of such components, responsible for issuing tokens which are needed to authenticate API consumers. Therefore, before making a API call, the application user should possess the relevant access token with him.
Obtaining access token can be done in multiple ways. In other words, the four of the above OAuth grant types can be used to obtain access token from the authorization server.
Let's see how we can obtain access tokens from each of the OAuth 2 grant types.
Setting up Client (Third party application)
As shown in the above picture, we will use a web application hosted in Apache Tomcat as the client.
Download playground2.0.war from here and copy it to TOMCAT_HOME/webapps directory. Make sure to update the following parameters in WEB-INF/web.xml
<servlet>
        <servlet-name>oAuth2ClientServlet</servlet-name>
        <servlet-class>com.wso2.identity.oauth.sample.OAuth2ClientServlet</servlet-class>
        <init-param>
             <description>serverUrl</description>
             <param-name>serverUrl</param-name>
             <param-value>https://localhost:9443/services/</param-value>
localhost is the server where we host WSO2 API Manager and 9443 is the default SSL port of it.
Also, make sure to update param-value of setup to AM as shown below.
<servlet>
        <servlet-name>oAuth2AccessResourcePage</servlet-name>
        <jsp-file>/oauth2-access-resource.jsp</jsp-file>
        <init-param>
            <description>setup</description>
            <param-name>setup</param-name>
            <param-value>AM</param-value>
        </init-param>
Restart tomcat and access http://localhost:8080/playground2.0/ (assuming tomcat is running on HTTP port 8080). You will be directed to the landing page of our sample application. Click on Import Photos and you will be shown the following page.

We can use this application to request access tokens using the four OAuth2 grant types.
Create and subscribe to a new API in WSO2 API Manager
Before exploring OAuth grant types supported by WSO2 API Manager, we need to add an API using the API publisher web app in WSO2 API Manager, publish it to the API gateway component and finally subscribe to the API through API store web app. I'm not going to repeat those steps in this post since I have already explained them in one of my previous posts. You will also find the WSO2 API Manager official documentation useful. However, I will explain one modification which will be important to continue with our example.
In WSO2 API Manager, an application user subscribes to an API or multiple APIs through an application. The OAuth keys are generated per application. Once you have access token in a particular application, you can call any APIs associated with it using the same key.
When you add a new application, you will notice an option to include a Callback URL with the application (see below).

Callback URL is a redirection URI in the client application which is used by the authorization server to send the client's user-agent (usually web browser) back after granting access. In our example, we will use http://localhost:8090/playground2.0/oauth2client as the Callback URL.
Once you create the application, you can subscribe to one or more APIs using the new application.

Make a note of access token, consumer key and consumer secret specific to your application.
Authorization code grant type with API Manager
Authorization code grant type is the recommended approach if the client is a web server based application such as a servlet, JSP etc. The authorization code grant type can simply be explained using the following steps.
1. Application (client) requests an authorization code from the authorization server by sending a HTTP GET request with the following query parameters.
response_type = code
client_id = VALUE_OF_CONSUMER_KEY
redirect_uri = REDIRECT_URL_OF_THE_APPLICATION
scope = SCOPE_OF_THE_ACCESS_REQUEST
The first two are mandatory parameters where as the last two can be optional.
2. The authorization server must return a 302 redirection back to the client with an Location header pointing to the URL of user consent page. (e.g:- Location: https://localhost:9443/carbon/oauth/oauth2_authn_ajaxprocessor.jsp)
3. User (resource owner) confirms the authorization requested by client (application) by specifying his credentials.
4. Authorization server responds back to the callback URL specified at the first step with an Authorization Code.
5. Application makes a HTTP POST request to get access token with the following POST parameters
grant_type = authorization_code
code = authorization_code_value_obtained_from_step_4
redirect_url = redirect_url_of_the_application
client_id = value_of_consumer_id
client_id = value_of_consumer_id
client_secret = value_of_consumer_secret
6. Finally, the authorization server returns an access token optionally with a refresh token
Let's explore more on the above steps, using our sample web application (act as the client/application) and WSO2 API Manager (act as the authorization server).
Step 1
Access the OAuth playground application as instructed in "Setting up client" section. Once you click on "Import Photos" icon, you will be landed in a page where you will find a form with various options such as Authorization Grant Type, Client Id etc..
Step 2
Select Authorization Code as the Authorization Grant Type.
Copy the consumer key value from the application you have subscribed in WSO2 API Manager (see above) and enter it in Client Id text box.
Specify any string value as scope. We do not really worry about scope attribute in this example.
Enter callback URL which must be identical to the value you have specified at the time of creating the new application in WSO2 API Manager.
e.g:- http://localhost:8090/playground2.0/oauth2client
Enter Authorize endpoint. This should be the endpoint of authorization server where it accepts the authorization requests. In WSO2 API Manager, there is an API to handle all authorization requests and it can be accessed through http://localhost:8280/authorize.
These APIs can be found in "Deployed APIs" page in API Manager management console (gateway) as shown below.

Once you completed adding all values in the form in the playground app, click on Authorize.
This will generate HTTP GET request similar to the following. You can see it contains all mandatory URL parameters which we have discussed in point 1 under "Authorization Code grant type".
GET /authorize?response_type=code&redirect_uri=http%3A%2F%2Flocalhost%3A8090%2Fplayground2.0%2Foauth2client&client_id=ePCzEHajPOZRKus4XS3pva_Ec5Ua%20&scope=my_scope HTTP/1.1

Connection: keep-alive

User-Agent: Jakarta Commons-HttpClient/3.1

Host: 127.0.0.1:8281
Step 3
When you click on "authorize" with all required parameters, the application generates the above HTTP GET call and you will be redirected to the user consent screen as shown below.
Click on Authorize. You will be provided with options to enter user name and password (username and password of the resource owner/end user).
Type admin/admin as user name and passeword respectively and click on login.
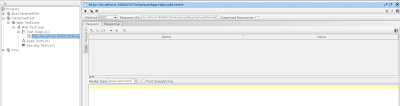
You will be directed to a new form with an Authorization Code. (see below)


Click on Authorize. You will be provided with options to enter user name and password (username and password of the resource owner/end user).
Type admin/admin as user name and passeword respectively and click on login.
Step 4
You will be directed to a new form with an Authorization Code. (see below)

Specify the same call back url which you have entered in step 2. (http://localhost:8090/playground2.0/oauth2client)
We are going to obtain an access token from the authorization server. Thus, we need to specify the endpoint URL of the API which returns access tokens. You can find it in the same way as we got the authorize endpoint from "Deployed APIs" page in API Manager management console (gateway). It will be similar to http://localhost:8280/token.
Specify client secret (consumer secret) value which can be found in the relevant application in the API store of WSO2 API manager (see above).
Click on Get Access Token. This will generate a HTTP POST request similar to the following.
POST /token HTTP/1.1

Content-Type: application/x-www-form-urlencoded

Cache-Control: no-cache

Pragma: no-cache

User-Agent: Java/1.6.0_29

Host: 127.0.0.1:8281

Accept: text/html, image/gif, image/jpeg, *; q=.2, */*; q=.2

Connection: keep-alive

Content-Length: 223


client_secret=fasxsVxJkTNzYtIAXxly8fR8s8ga+&grant_type=authorization_code&redirect_uri=http%3A%2F%2Flocalhost%3A8090%2Fplayground2.0%2Foauth2client&code=7dea8b1258febe471f2dad424dad6fd&client_id=ePCzEHajPOZRKus4XS3pva_Ec5Ua
Compare this with the mandatory parameters which we have explained under point number 5 in authorization code grant type.
Step 5
You will get an access token (typically a JSON response) which can be used to do the actual API call.
We will discuss the usage of implicit OAuth grant type in the next post. Stay tuned!!!
Comments
As you explained here we have set
redirect_uri = http://localhost:8090/playground2.0/oauth2client
and since we have set the
response_type = code
authorization code should be returned as a query string parameter.
since we are using web client we can take the out the authorization_code form the redirected URL easily.
But if the client cannot listen on an HTTP port, for an example windows client application then what would be the approach of setting redirect_uri and also
I have seen most APIs have around 30 second of validity period for authorization code then comes another problem , if the approach for authorization
code take out process not an programmatic one then 30 sec may elapsed easily and
authorization server will return authorization code has expired.
Is there a proper approach to address this? Please advice.
Windows client app can be categorized as a native app and OAuth2.0 spec suggested to invoke an external user-agent (browser) or embed user-agent within the app itself.
See below in http://tools.ietf.org/html/draft-ietf-oauth-v2-31#section-4
Native applications are clients installed and executed on the device
used by the resource owner (i.e. desktop application, native mobile
application). Native applications require special consideration
related to security, platform capabilities, and overall end-user
experience.
The authorization endpoint requires interaction between the client
and the resource owner's user-agent. Native applications can invoke
an external user-agent or embed a user-agent within the application.
For example:
o External user-agent - the native application can capture the
response from the authorization server using a redirection URI
with a scheme registered with the operating system to invoke the
client as the handler, manual copy-and-paste of the credentials,
running a local web server, installing a user-agent extension, or
by providing a redirection URI identifying a server-hosted
resource under the client's control, which in turn makes the
response available to the native application.
o Embedded user-agent - the native application obtains the response
by directly communicating with the embedded user-agent by
monitoring state changes emitted during the resource load, or
accessing the user-agent's cookies storage.